A couple of days ago Apple released iOS 9.3.2 which comes with number of bugs fixes and improvements. In case you’ve upgraded your iPhone, iPad or iPod Touch to iOS 9.3.2 accidentally or facing any kind of problems within it, then we are happy to tell you that you can still downgrade from iOS 9.3.2 back to iOS 9.3.1 as Apple is still signing the iOS 9.3.1 firmware file.


Important Notes:
- You’ll only be able to downgrade back to iOS 9.3.1
- You’ll be able to downgrade as long as Apple continues to sign iOS 9.3.1 firmware file.
- Make sure to backup your device before proceeding into this downgrade guide to avoid losing any data.
- Apple doesn’t recommend downgrading so; please proceed at your risk.
Check real time signing status
Always check if Apple still signing the firmware file or not, check this website. Green rows with a tick mean that Apple is still signing the firmware file, and you can downgrade from iOS 9.3.2 to iOS 9.3.1.
How to downgrade from iOS 9.3.2 to iOS 9.3.1
STEP 1: Download the iOS 9.3.1 firmware file for your device. The iOS 9.3.1 firmware file for iPhone 6s Plus is iPhone8,2_9.3.1_13E238_Restore.ipsw. You can download it from our download page
STEP 2: You now need to put your device in DFU mode.
- Plug your device into your computer.
- Turn off the device by holding the Sleep/Wake or Power button and swiping it off.
- Hold the power button for 3 seconds.
- Begin holding the Home button without releasing the Sleep/Power button for 10 seconds.
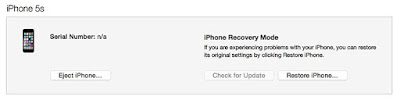
- Release the power button and continue holding the home button until you get a popup from iTunes that it has detected that your device is in Recovery mode.

STEP 3: Click on the Ok button.
STEP 4: Hold the Alt/Option key on the Mac or Shift key in Windows on your keyboard and click on the Restore iPhone… (iPad/iPod touch…) button. Note: If you directly click on the Restore iPhone button without holding the Alt/Option key on the Mac or Shift key in Windows will result in restoring your device back to iOS 9.3.1.

STEP 5: Select the iOS 9.3.1 IPSW file you had downloaded earlier.
STEP 6: Then click on the Restore and Update button to continue.
STEP 7: In the next screen, it will give you information about the iOS 9.3.1 update. Click on the Next button, followed by the Agree button to continue.
STEP 8: iTunes will now verify the software and install it on your device. It should take around 10 minutes.
After it is successfully restored to iOS 9.3.1, you should see the white ‘Hello’ screen. Follow the on-screen instructions to set up your device, and restore your device from the backup to restore your personal data.
That’s it. Your iPhone or iPad should now be successfully downgraded to iOS 9.3.1.