The Continuity Camera feature of macOS Mojave and iOS 12 allows you to use your iPhone or iPad to take a photo of something or scan a document and it will appear instantly on your Mac. Many apps, including Messages, Mail, Finder, and more support the feature of Mac and iOS.

What is Continuity Camera?
Continuity Camera is a feature of macOS Mojave and iOS 12 that allows you to access your iPhone or iPad camera from your Mac. Then you can quickly transfer photos taken with the camera over to an application that you’re currently using.
For instance, you’re working on a Pages document on your Mac and you want to put a picture of something that is sitting right next to you on to that document. You can do that by activating Continuity Camera, then take a picture using your iPhone and the photo will immediately pop up in the document you’re working on your Mac.
Continuity Camera Requirements
The feature works only when you meet the following requirements:
- Your Mac must be running macOS Mojave or later.
- Your iPhone, iPad, or iPod Touch must be running iOS 12 or later.
- Both the iOS device and your Mac are signed in to iCloud using the same Apple ID with tw0-factor authentication enabled.
- Both the Wi-Fi and Bluetooth turned on your Mac and iOS device.
- Both devices are near each other.
Continuity Camera supported applications
The following Apple apps currently support the Continuity Camera feature:
- Keynote 8.2
- Numbers 5.2
- Pages 7.2
- TextEdit
- Finder
- Messages
- Notes
For third-party apps support, please check with the developers if their apps support Continuity Camera or not.
How to use Continuity Camera
Here we are going to talk about how to use Continuity Camera feature on your Mac and it can be a continual time saver.
How to take a photo using Continuity Camera
In order to take a photo with Continuity Camera, you must be working with an editable document.
- Launch a supported application on your Mac such as Pages, Keynote, TextEdit, or Finder.
- Open your document or a project in the supported app.
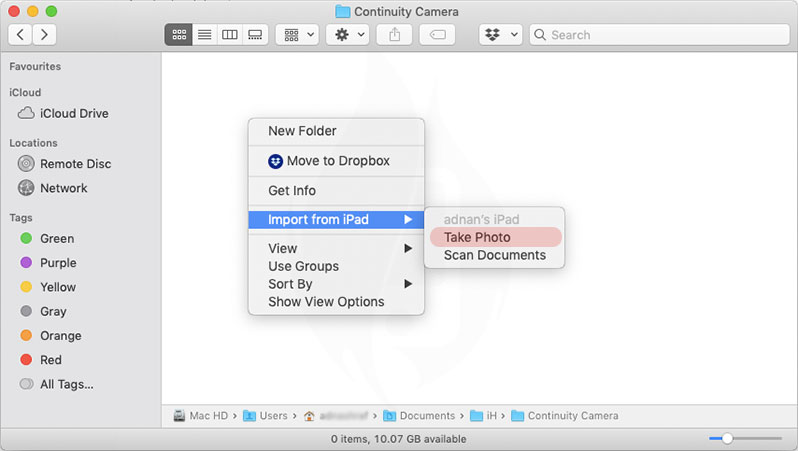
- Right-click, Control-Click, or two-finger click on a space where you want to insert the photo inside the document.
- Go to Import from iPhone or iPad.
- Click Take Photo.
If you see multiple Take Photo options, then click Take Photo under the iOS device name that you will use to capture that photo.
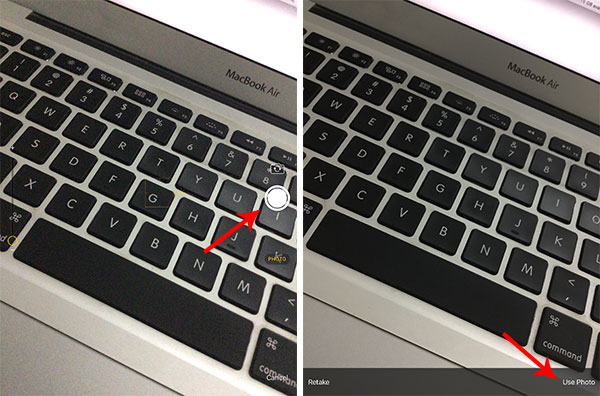
- Take the photo using your selected iPhone or iPad.
- Tap Use Photo to import your clicked photo in your document where you had clicked in step 3.
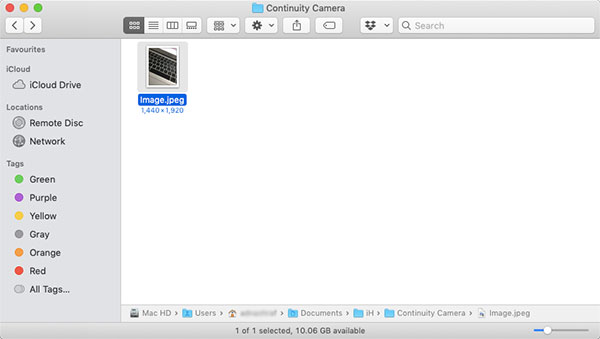
Since I used Finder to capture and import photo using my iPad, the photo instantly appeared in my Finder window.
How to scan a document using Continuity Camera
In order to take a photo with Continuity Camera, you must be working with an editable document.
- Launch a supported application on your Mac such as Pages, Keynote, TextEdit, or Finder.
- Open your document or a project in the supported app.
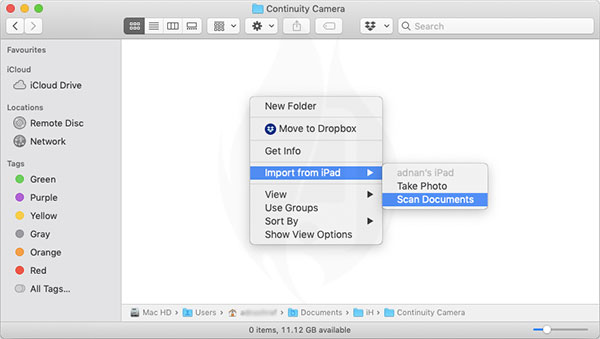
- Right-click, Control-Click, or two-finger click on a space where you want to insert the photo inside the document.
- Go to Import from iPhone or iPad.
- Click Scan Documents.
If you see multiple Scan Documents options, then click Scan Documents under the iOS device name that you will use to scan.
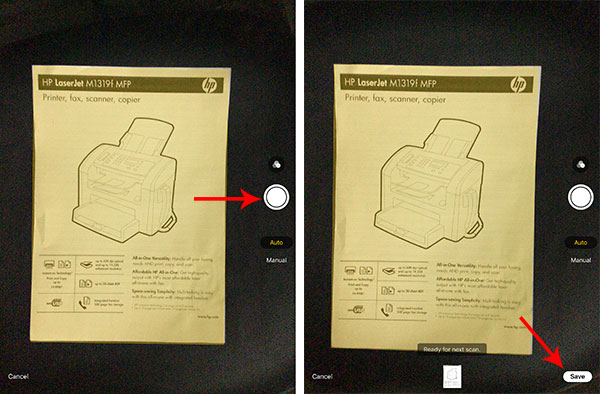
- Place your document in view of the camera on your iPhone or iPad and wait for the scan to complete. If you want to manually capture a scan, Use the capture button on the screen or press any volume button.
- Use the handling controls to drag the corners to adjust the scan to fit the page. Now tap Keep Scan.
- You can scan additional documents or tap Save.
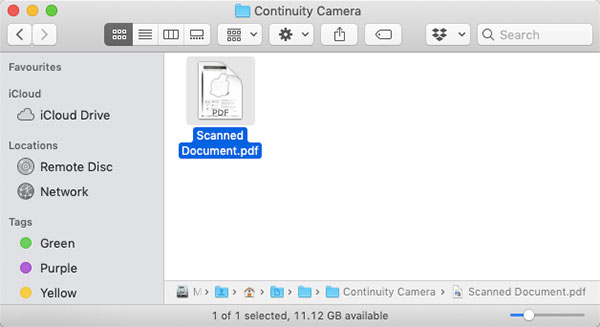
- Your scan will appear in Documents as a PDF document or the active window on your Mac.
Apple also provides some more ways to use Continuity to connect you iPhone, iPad, Mac and Apple Watch here.
The post How to use Continuity Camera on macOS Mojave and iOS 12 appeared first on iPhoneHeat.


